Enduro Suspension Setup: Where to Start
Understand sag, preload and damping when setting up an enduro bike. Learn what to measure and when to use the model manual or a qualified technician.
28 Aug 2026

Understanding enduro suspension starts with what the spring and damping do, not with randomly turning screws. If the unit leaks, stability deteriorates or the suspension bottoms harshly, stop testing and arrange a qualified inspection. This article explains the terms that help you describe a problem and understand a technician’s setup plan; it is not an adjustment procedure for every motorcycle.
Suspension units and equipment differ between enduro bikes. A fork’s appearance or the motorcycle’s name does not establish which adjustments are fitted. The exact fitted-unit manual is the reference for values and procedures; a qualified technician assesses the spring and baseline for your weight and equipment.
What is a suspension system and why do you need to modify it?
The suspension system connects the wheels of an enduro bike to its frame. Both the front and rear suspension systems operate on the same basic principle: springs, oil, and internal valves. The springs support the bike's weight and affect its ride height, while the oil and valves control the compression speed of the suspension system and its return to its original position after an impact.
So, what exactly is the function of the suspension system? First, it helps the wheels stay in contact with the ground when riding on uneven surfaces or descending. Second, it absorbs shocks so the bike doesn't hit the ground too easily or bounce too hard. Third, it maintains rider control. A good suspension system shouldn't force you out of the seat or make the handlebars feel like they're resisting your hands.
A technician considers mechanical condition, spring rate, sag, preload and damping together. Understanding that relationship helps you discuss a problem: the bike’s position under load is different from the speed of suspension movement, and changing one does not necessarily correct the other.
Types of suspension systems in enduro bikes
The suspension system on enduro motorcycles varies from model to model. Some bikes are simple and don't offer much room for adjustment, while others are designed for heavy-duty riding and give you more options for fine-tuning the settings.
Types of front suspension
- Traditional telescopic fork: A common design that may be simple or adjustable depending on the model; the shape of the fork alone does not determine its level of equipment.
- The inverted fork (USD): common in sport off-road bikes, it may provide structural rigidity and precise control, but the quality of performance depends on both design and tuning.
- Adjustable fork - A fork that allows you to adjust the rebound, compression, or sometimes the preload, depending on the model.
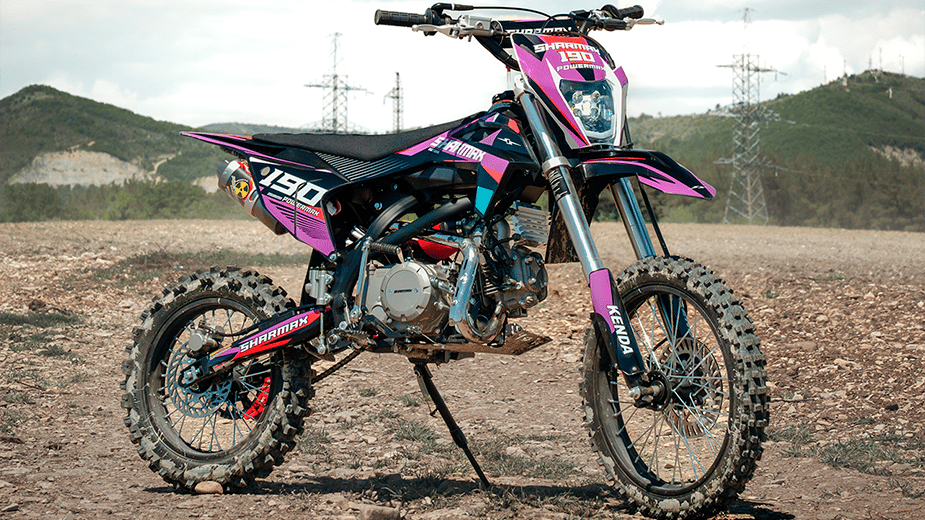
telescopic front fork
Rear suspension types
- Basic rear shock absorber - usually the simplest setup, often only equipped with spring preload adjustment.
- Adjustable rear shock absorber - can include rebound and compression settings, giving the rider more control over how the bike reacts.
- Advanced shock absorber with reservoir - designed for tougher riding, better heat control, and more stable damping during long or aggressive off-road driving sessions.
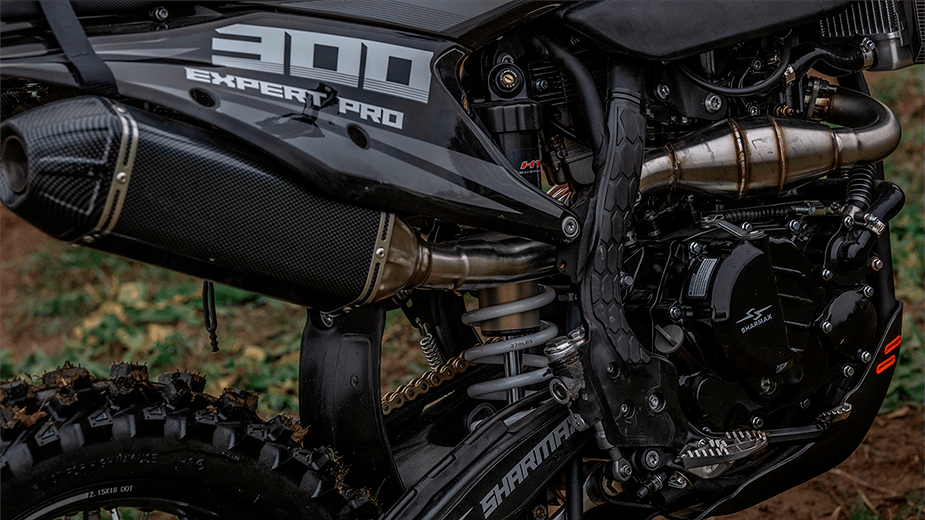
A single-shock rear suspension system with coil springs and an external reservoir.
What suspension settings can you adjust?
Before you start changing anything, it's helpful to understand the four main suspension settings. These are the foundations of any guide to setting up suspension on enduro bikes.
- The spring rate describes the amount of force required to compress it a certain distance. Choosing the right rate for your weight and equipment is essential; it doesn't change by turning the damping screw. An unsuitable spring may need to be replaced by a professional, not subjected to excessive pre-loading.
- Spring preload is the initial tension applied to the spring. This preload doesn't make the spring itself "stronger," but it does change how much the bike drops under its own weight and the rider's weight. This is directly related to drop, so it's one of the first things to check when adjusting a bike.
- Rebound damping controls how quickly the suspension extends after being compressed. Too little rebound damping can let the bike bounce excessively. Too much can prevent it from extending sufficiently before the next bump.
- The compression damping system controls how quickly the suspension system compresses when the wheel hits a bump, pothole, rock, or when descending.
Begin by understanding the model’s documented baseline. A technician assesses spring rate and preload using the specified measurements, then considers damping when needed. Do not confuse the motorcycle’s height under load with resistance to suspension movement.
What information does a suspension technician need?
Before the inspection, identify the motorcycle’s model and year, the fitted fork and shock, and any previous modifications. Record your weight with normal riding equipment and typical luggage. These are useful inputs for the technician, not a recipe for a generic setting.
Describe when the problem occurs: during braking, acceleration or repeated bumps? Report leaks or unusual noises without opening a unit or improvising a way to lift the motorcycle. Do not continue riding to diagnose a leak, binding movement or unstable handling.
Ask for a written record of the measurements and baseline after inspection. That record helps track the condition and review later changes rather than relying on memory.
Sag: understanding the motorcycle’s position under load
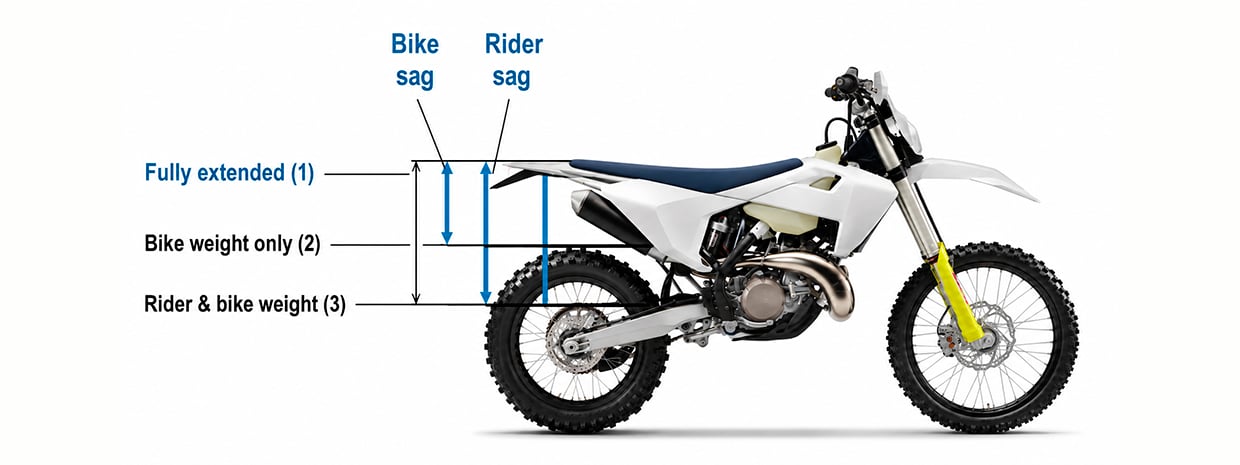
Sag is the amount the suspension compresses from its fully extended position. Free sag is measured under the motorcycle's own weight; rider sag is measured with the rider and normal riding equipment on board. Comparing both helps assess the spring rate and preload.
So why is this so important? The suspension sag allows it to work in both directions: upwards when compressed over bumps, and downwards when the wheel hits potholes, ruts, or uneven ground. If the sag is too high or too low, the suspension loses some of its range of action, and the bike becomes more difficult to control.
How are sag measurements interpreted?
Sag describes suspension compression under load. A technician compares a reference length at full extension with the length under the motorcycle’s own weight, then with the rider and equipment aboard. Support method, measuring points and rider position must come from the model’s procedure; they are not identical on every design.
For interpretation only, if the extended length is called L1, the motorcycle-only length L2 and the rider-loaded length L3, free sag is L1 − L2 and rider sag is L1 − L3. This relationship does not establish the target or a safe lifting method. Ask the technician to record the readings against the exact unit’s reference.
Choosing the Correct Sag Setting
The target comes from the motorcycle or fitted suspension-unit manual. Do not copy a travel percentage or millimetre value from another bike: the source may describe free sag, rider sag or a different measurement method.
If the readings cannot match the reference within the permitted range, the technician assesses spring rate and mechanical condition. Excessive preload is not a substitute for a suitable spring.
What does an out-of-range sag reading mean?
Excessive rider sag means the rear sits lower under load than the target for that model. Record the measurements and have the spring rate and preload assessed against the exact suspension manual; do not tighten collars simply to chase a generic percentage.
Too little rider sag means the rear sits higher under load than the model’s target. A qualified suspension technician can determine whether preload or spring rate is responsible. The permitted adjustment range and method depend on the fitted unit.
This establishes the motorcycle's position under load before compression and rebound damping are adjusted. If free sag and rider sag cannot both be brought within the specified ranges, the spring rate may be unsuitable.
Tip: Do not compensate for an unsuitable spring by applying maximum preload. Compare free sag and rider sag, and consult a suspension specialist if the correct values cannot be reached within the adjustment limits.
Preload: what does it change?
Spring preload is the initial pressure applied to the spring before the suspension system begins to operate under the rider's weight. It helps adapt the motorcycle to the rider's weight, equipment, and riding conditions.
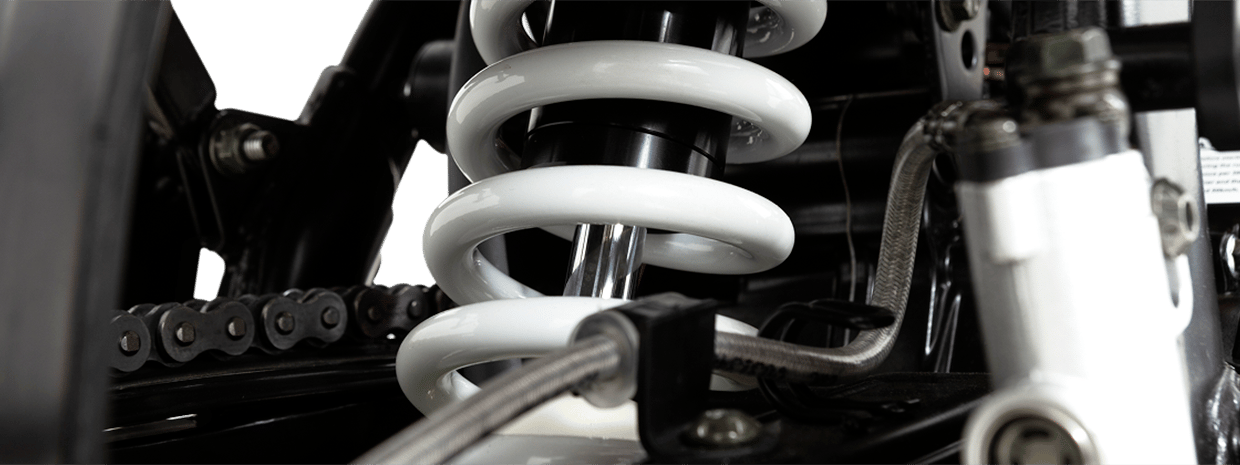
Note: Many riders mistakenly believe that preload changes the spring's stiffness; this is incorrect. The spring's stiffness remains constant. Preload primarily affects the bike's ride height. Increasing the preload compresses the spring, causing the bike to ride higher. Decreasing the preload loosens the spring, causing the bike to ride lower.
To adjust the preload, the amount of spring compression is changed. On many motorcycles, this is done using preload adjusters, rings, or spacers, depending on the suspension design.
Front suspension: If an external preload adjuster is fitted, identify it and follow the manual. Settings may be given in turns rather than clicks, and the two fork legs may serve different functions. Removing fork caps or adding internal spacers is not a simple beginner adjustment.
Rear suspension: preload changes the suspension position under load, not the spring rate. Identify the fitted shock and its specification before any adjustment. If the manual, tools or procedure are unclear, have a suspension technician make the change rather than turning or striking the collar.
Damping: the speed of suspension movement
After adjusting the springs and preload, you can move on to damping. Damping controls the speed of the suspension system. In other words, it determines how quickly the fork or damper compresses and returns to its normal position after an impact.
This is one of the key parts of front fork adjustment that motorcyclists quickly notice, because it changes the way the bike responds to shocks.
There are two main damping settings: compression and rebound.
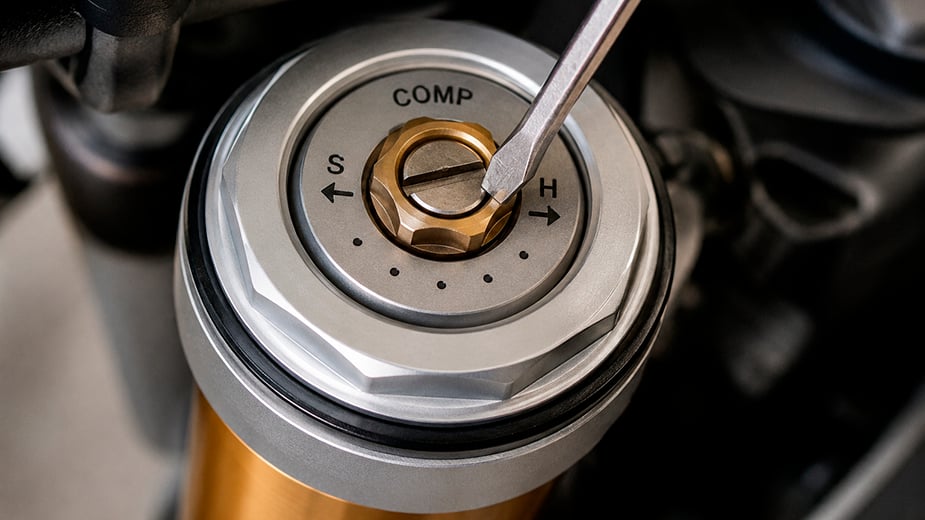
Compression damping: How quickly the suspension system compresses
The compression damping system controls the compression speed of the suspension system when the wheel hits an obstacle.
More compression damping increases resistance to compression and can feel harsher. Less allows easier movement, but too little can use excessive travel or cause bottoming. Spring rate, sag and tyres also affect the result.
With too little compression damping, the suspension may use excessive travel or bottom out over large bumps, on landings or under hard braking. Check spring rate and sag as well as damping before making changes.
If the compression is too high, the ride becomes harsh. The suspension doesn't have enough time to absorb repeated shocks, so the impact is transferred to your hands and body. With a front fork, you might feel as if the handlebars are resisting you. With a rear damper, the rear wheel might slip off obstacles instead of staying firmly in place.
Rebound damping: How quickly the suspension system recovers
Rebound damping controls how quickly the suspension system returns to its normal position after compression.
If the suspension rebounds too quickly, the bike may feel springy. After a jump or a hard impact, the suspension may rebound too fast, causing the bike to bounce and lose stability.
If rebound is too slow, the suspension may not extend sufficiently before the next bump. This is called packing down: after successive bumps it rides lower in its travel and may bottom out.
If the suspension does not recover between bumps, damping, spring rate or internal friction may be involved. Describe the symptom to a technician rather than guessing a direction for the adjuster. Do not use a more difficult trail as a diagnostic test.
After significant drops, the recovery should be controlled without pushing the bike too high or keeping it compressed. Look for balance through testing, not a rule that says every fast track requires a slower rebound.
Note: The front and rear suspension should be balanced, but there's no absolute rule that the rear should always return slower than the front. Design, springs, damping, and load all contribute. If instability persists, go back to the basics and seek professional evaluation.
Why does damping need an exact reference?
Many guides specify a basic setting in terms of clicks or revolutions from a reference point, such as 10 or 15 clicks, but these are illustrative examples and not a suggested setting for your bike. Some dampers don't use clicks at all.
Damping reference positions and permitted ranges depend on the suspension unit. Identify the adjusters and record the existing settings without forcing them against a stop. A trained technician should establish the baseline using the exact manual; there is no safe universal click count or direction.
Use the front and rear unit manuals as separate references, since the adjusters may serve different functions. Ask the technician to document the baseline and every approved change so the setting can be checked or restored if handling deteriorates.
Rear shock absorber specifications
The rear damper works on the same basic principle as the fork, but it may look different due to the linkage system and the way the rear wheel moves under load.
Some modern rear shock absorbers also have separate high-speed and low-speed compression adjustment.
High-speed compression damping relates to the speed of movement of the damper shaft, as in sharp impacts, roots and descents, and not to the speed of the motorcycle.
Low-speed compression is related to slower damper shaft movement, such as weight transfer during acceleration and braking, and gradual changes in ground clearance. There is an overlap in the effects of these settings depending on the unit's design.
How to review the result of service
After service, ask what changed and why, and obtain a record of the baseline and any user-permitted range. Handling must be reviewed using an evaluation specified by the technician, on appropriate ground and under supervision when needed. Do not start with a descent or jump to prove the result.
- Record the original symptom, measurements and work performed.
- Avoid combining undocumented changes: that makes the cause of a handling difference difficult to identify.
- If stability worsens or a leak or new noise appears, stop the evaluation and return to the technician.
- Do not open a pressurised unit or change internal components without training and the exact service procedure.
The useful outcome is a documented setup appropriate to the motorcycle and rider, not the largest difference you can feel. Learning the terminology and observing symptoms helps more than chasing a generic click count.
Frequently Asked Questions
1. How can I adjust the suspension system on an enduro bike if I am a beginner?
Start with a mechanical inspection and the exact model’s suspension manual. Have a qualified technician establish the spring, rider-sag and damping baseline for your weight and equipment. Learn to recognise symptoms and record settings before attempting any adjustment permitted by that manual.
2. What is the most important part of an enduro motorcycle suspension system?
The mechanical condition, the correct spring, and the proper sag are the foundation of adjustment. The sag is not the same as the compression damping; the former determines the suspension's position under load, while the latter affects its resistance to compression. After adjusting the foundation, the comparison of the damping effect becomes clearer.
3. What is the difference between adjusting the front fork and adjusting the rear damper?
Adjusting the front fork affects how the bike handles bumps, braking, steering, and front-end stability. Adjusting the rear damper in enduro settings affects traction, rear wheel control, landing, and how the bike responds during acceleration. Both adjustments must work together; otherwise, the bike will feel unbalanced.
4. How often should I check the suspension adjustment on my off-road motorcycle?
Check sag and baseline settings when rider weight, riding equipment or terrain changes. Review them after suspension servicing, a fork-oil change or a shock rebuild. Even small changes can noticeably affect the bike.
5. Can adjusting the suspension system improve the performance of motorcycles designed for endurance racing?
Yes. Properly adjusting the suspension is one of the easiest ways to improve the performance of an enduro motorcycle without having to change engine parts. A well-tuned motorcycle maintains better stability, feels quieter on rough terrain, has a smoother landing, and allows the rider to stay active for longer.